Cloud chamber - Peltier style
- PlanetReynolds
- Sep 2, 2018
- 3 min read
After an inspiring summer holiday where I travelled the country looking at some great science, I was inspired by a demonstration with a cloud chamber, an inspiring way to view fundamental particles.
Most cloud chambers are easily built with dry ice pellets, but working at a school where my photo copying is restricted to half a page per pupil per lesson; I was looking for something that would not be a drain on resources and would reliably work! Looking at buying an electric one the cost was around £800, this was certainly out of my personal budget. So me being me I decided that I would attempt to build one!
This blog is a quick reminder for myself on how I built the cloud chamber.
First up the parts :
Old computer power supply (I need the 5V, 12V power supply)
Peltier coolers (x 2)
Water pump, and tubes
petri dish and container.
welding rods (thorium)
felt.

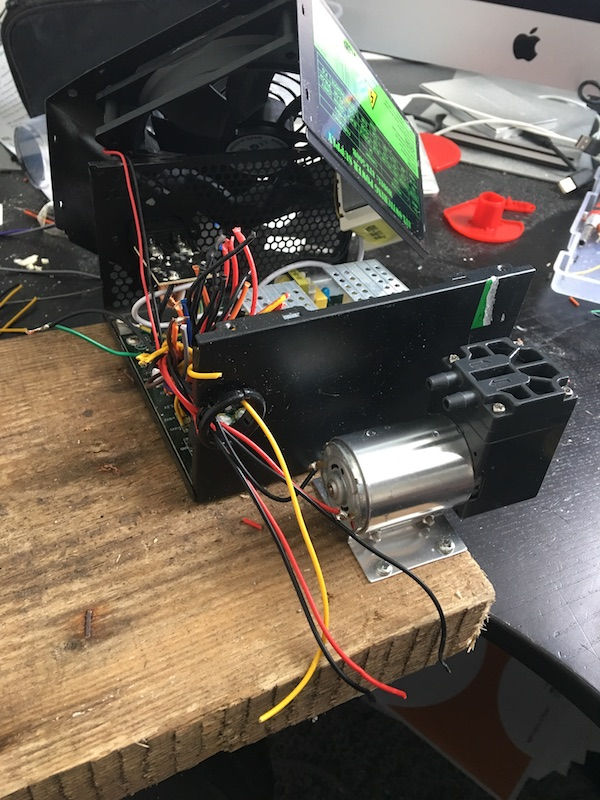
First little job was to tidy the power supply so I have only the 6 wires I need. The power supply will need two wires permanently soldered together, PSU-On needs to be soldered to ground, and I found after some trouble an unlabelled brown wire will need to be fixed to 12v.

After testing the power supply and screwing it to a base I used some hot glue to make the supply safe.
I also screwed the water pump into position and soldered a 5V supply to it. This gave the cooling system a nice slow but steady supply of water. I would have liked to increase the speed of the pump slightly and may modify this later with a potentiometer so I can vary the speed.

Next up was using the cooling block and carefully carving out a space for it within some old insulation I had.
This stuff was great for modelling with and position the block so the cold side of the Peltier was kept separate from the hot side.

The next state was easy, using the heat compound put the first Peltier block (Model 12710) on the bottom wire at 12V. The next was the top Peltier block (Model 12709) and this one wired with a 5V supply.
Testing the cooler and the blocks the temperature should decrease to around -35℃ very rapidly
This is where the I did not take any pictures as I was clearly too excited to carry on building! so apologies.

This was the next stage where I wired all of my Peltiers' up and then used hot glue to keep my black spray painted petri dish in position.
I used a lot of thermal paste on the dish and the Peltier. The thermal compound made a real difference to getting the temperature down.

Finally with ice water in a bucket, the pot I used to cover the petri dish with felt covered in isopropyl alcohol (99.9%). The pump running for about 2 minutes I could see some fundamental particles shooting around. You can see a few if you are using static from a balloon but the best results i had is with the thorium welding rods.
This blog is a little bit of a rushed mash up so if anyone is interested and want some better instructions I managed to get my information from the sites shown below.


Comments